Tuesday, 5 March 2013

Christmas in March?

Hi there,

After three months, I finally hunkered down and got a Christmas layout done. Two pages, actually. What a feat. I'm not big on holiday pages and Christmas is the worst. Don't get me wrong; I love Christmas as a holiday, but I seem to difficulty when it comes to scrapbooking the event. Dark, indoor, repetitive photos and so many that I don't know which ones to put down on the page.

For this double pager though, I have two wonderful subjects, so it was easier to get done.  When Miss C and her cousin get together (which is not often as one lives in the UK and one here in HK), they are thick as thieves. It's so nice to see the interaction. Like brother and sister, without the fighting. I guess it's because they only see each other for a few weeks out of a year.

Naughty? Nice?
 I don't usually do a lot of double layouts, but this one had too many cute photos not to be included. I did them both in contrasting papers, but kept the embellishments similar to keep it cohesive.
 I was originally going to do two separate layouts, but in the end, decided to combine them both.
 That way, I could add in more photos, and not worry too much about embellishments or a title space.
 The chipboard, brads and papers are super cute.
What could be better than Father Christmas on skates?

Products Used
Papers, mini letter stickers and brad from Bo Bunny Mistletoe collection
Chipboard embellishments from MAMBI
White cardstock

I know for sure I have one more Christmas layout to do for 2012. Let's see what time of year that one gets done. Haha.

Thanks for dropping by,


Sunday, 3 March 2013

Quick and Simple Layouts

Hello,

If you've looked at my layouts, you will see that I prefer layering, fussy cutting, inking, some stamping and distressing. Most of my pages take three to four hours or more to do. It's not always easy to find such a stretch of time in one go, so, once in while, I have to do quick layouts. Ones that take half an hour to an hour, from start to finish. It's so satisfying to get several pages done in a day or two, especially on the weekends when I have to fit it between spending time with the hubby, child and two cat babies.

For these pages, I've kept embellishments to a minimum, mostly just using my trimmer to cut out the paper and sticking it down. There is minimal layering, using the contrast of colours and patterns to build the layouts instead.

The first two layouts feature new winter CHA release, Glitz Design Color Me Happy, which are in the HKMC shop right now. I had four pieces of paper and just a handful of embellishments (semi transparent overlays and die cuts, a roll of washi tape and a roller stamp) to work with, but they were so colourful and a little goes a long way.

Hello
The paper comes with the rainbow stripe frame, which already takes out half the work. I love all the colours of this paper line.
 I jumped for joy when I saw the air balloon. I just love them. The black arrow tags were cut from another of the Glitz papers.
 How whimsical are all the elephants - this big one reminds me so much of Elmer the Elephant, with its patchwork pattern.

Products Used
Papers, diecuts, overlays, washi tape from Glitz Design Color Me Happy collection

Loving This Moment
 I love the contrast of the rainbow colours with stark white cardstock. It just makes everything pop.
For the masked area, I taped off a section of a 12"x12" stencil before misting with several colours. Let it dry and then use the stencil to outline the pattern in black pen. Easy as that. For the multi-coloured arrow tag, I coloured each raised section on the roller stamp with distress markers, and rolled out onto a spare piece of card before cutting it out.
 The title was cut using my eClips. I wanted a subtle title, hence the light grey.

Products Used
Papers, diecuts, overlays, washi tape and roller stamp from Glitz Design Color Me Happy collection
White cardstock from Bazzill
"Paradise" Template from Crafter's Workshop 
Colour spray inks from Dylusions for Ranger Inks
Wooden camera from Kaisercraft

Underwater Diva
 For the last layout, I love this photo so much and wanted it to be the main focus, so all other elements were kept to a minimum. I also like the kraft colour chevron that contrasts nicely with the blue backing.
I stamped the "documented" on one of the patterned papers and cut it out. The acrylic bracket is anchored in place by some stitching.
I used a 6"x6" chevon mask to add some light molding paste for a little more dimension. This was also very quick. Once you've figured out how you are going to lay out your page, take everything off and just add the molding paste in small areas, where you know they will still be seen. A quick blast with a heat gun will set it and then place everything else back on.

Products Used
Papers, flowers, word stickers and black mini letters from Pebbles Inc. Walnut Grove collection
Mini blue letters from AdornIt (discontinued)
Clear acrylic bracket from Bo Bunny Chunky Charms
Documented stamp from Kelly Purkey stamps
6" x 6" Herringbone template from Crafter's Workshop
Distress Ink by Tim Holtz for Ranger Inks
Teal threads

There we are. Three layouts in two days. So, challenge yourself to try and get a few more pages done, quickly and simply. Minimum cutting, minimum fuss.

I'd love to see what you come up with.

Thanks for looking,


Saturday, 2 March 2013

Boys Will Be Boys

Hello again,

At the end of January, I mentioned that there were a couple of layouts that I was holding off showing you before the papers arrived at the HKMC shop. I'm so happy I can finally show you what they are.

Echo Park, one of my favourite brands, have come up with the cutest boy and girl lines this CHA. The collections, "All About A Boy" and "Sweet Girl", designed by Lori Whitlock for Echo Park, are just the cutest.  Both collections are available at HKMC now.

All About A Boy Collection
 Since I have a girl, I've done mostly girly layouts, so I jumped at the chance to work with this line when I saw it. Who could resist all these papers? I love the blues, oranges and browns together. The designs are just too cute: yoyos, gears, game spinners, scrabble tiles, the maze!

 Sweet Girl Collection
The girl line is just as cute. With lots of strong pinks and teal, this line has a good balance of florals and geometrics, as well as retro designs, like the vintage alphabet board, girly dresses and pie charts. One of the other girls will be working with this line and hopefully, we can show you some of her layouts on the HKMC site soon.

And now, for the reveal on the layouts I did with the boy papers. They were so much fun to do and really hit that "boy" spot for me, scrapbooking wise.

Coolest Boy Ever
 I absolutely love these photos of Miss C's cousin, which I took a few years ago, and I'm so happy I've found the right papers to use with them. I just love the maze pattern on the base paper and how it matches the maze-like quality of the photos.
I cut out a few game spinners circles and added some Tim Holtz spinners and gears. I added burlap and embossed tags to give a little more texture and interest.
Look at the orange hexagon letters - just too cute.

Products Used
Papers, stickers and sticker letters from Echo Park All About A Boy Collection
Burlap from Canvas Corp
Metal games spinners, brads and sprocket gears from Tim Holtz Ideo-logy

Look Out
 In contrast to the first layout, I used an orange houndstooth base paper. I die cut tags and cut out the centres to make tag frames for the photos.
I used "stitched" fabric Thickers for the title to go with the denim paper tag. How apropos are all the word stickers for these photos? Perfect.
This yoyo paper really caught my eye. Super cute.

Products Used
Papers and stickers from Echo Park All About A Boy Collection
Stitched fabric Thickers from American Crafts
Kraft cardstock by Bazzill

Thanks for looking,


HK Memory Chest Kit Club - March 2013

Hey everyone,

New month, new kit to show you. Just as last month's kit was full of pastel/spring colours, the March kit brings in major nostalgia with vintage papers and embellishments.

This month's pack introduces a new company, FarmHouse Paper Company. The collection, Market Square, feature retro and vintage collectables from the forties and fifties (my favourite is the gumball machine chipboard die cut).

March 2013 Kit
10 sheets FarmHouse Paper Company Market Square Paper (all different)
1 pack FarmHouse Paper Company Market Square Barbershop Chipboard Stickers
1 pack FarmHouse Paper Company Market Square Sticker Sheets (six sheets per pack)
1 pack FarmHouse Paper Company Market Square Barbershop Stamp Set

Add-On Options
FarmHouse Paper Company Market Square Emporium Chipboard Stickers
FarmHouse Paper Company Market Square Emporium Stamp Set
FarmHouse Paper Company Market Square Botanicals Flowers

March Sizzix Die
Spellbinders Country Charm Die Set
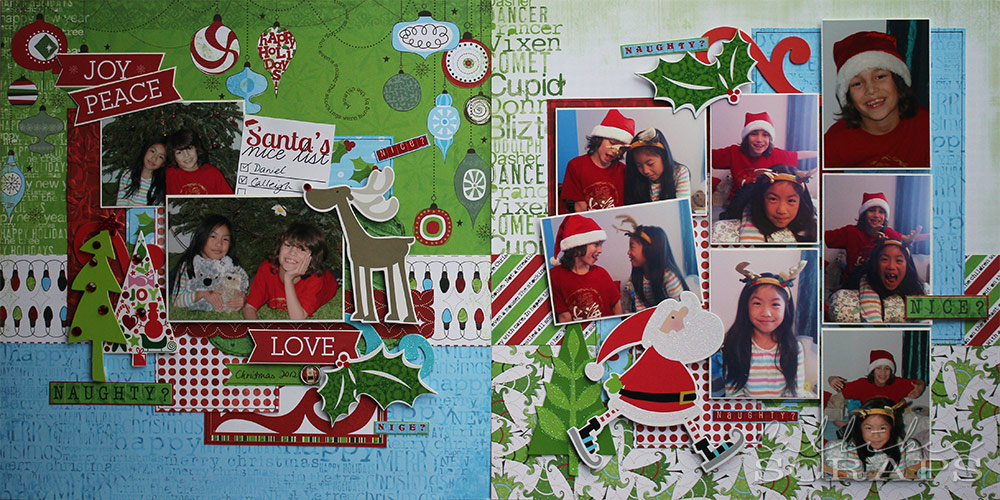
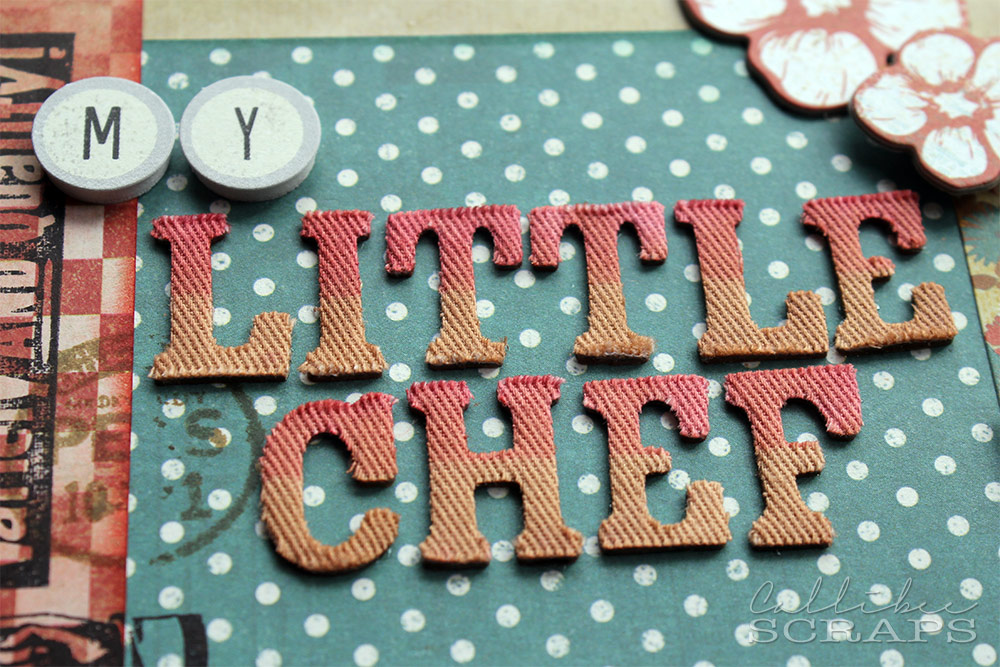
My Little Chef
 The reds and blues compliment each other well. I used a brick mask on the base paper and the stamps before layering on my other papers. This layout is also for the February My Creative Sketches sketch challenge that I try to do every month.
 I love these Thickers diy chipboard letters, which you can spray, ink or stamp as you wish. I masked half of the letters, spraying one colour, before masking the other half and spraying in another colour, creating this two-tone effect.
 The flowers on one of the papers is ideal for fussy cutting and layering. I also placed a Kaisercraft wooden leaf extending out from the flower cluster.
This month's die is super cute, with a jam jar and different fruits. The fun thing about them? You can die cut and emboss with one die, with the help of an embossing mat.

Extra Elements: Thickers DIY fabric chipboard letters, Kaisercraft Wooden Flourishes - Vines, Red and Green cardstock, Distress Inks, Archival Inks

Milkstache
The red base paper with its subtle newspaper advertising print contrasts well with the rest of the papers.  I also love the old cash register price tags at the bottom of the page. The photo - yes, they are the same one (I printed one slight lighter than the other, so decided to use both) - is so cute; Miss C with her cheeky moustache grin.
 I had to place the clock somewhere. It's just too cute.
 I fussy cut the group of pennies from one of the papers and I love the effect of them on the left of the page.

Extra Elements: Thickers foam letters, Distress Ink

Cigarillo Tin Mini Album
 I have a small collection of empty wooden cigar boxes and cigarillo tins that I keep with altering in mind. For the tin, I sanded it down a bit before brushing on gesso. Once it dried, I sanded lightly again to remove some of the gesso to expose some of the tin underneath. I then used distress inks to give it a worn look. Lots of inking and stamping was done before laying on the details for the tin top.
There's the bubble gumball machine on the front, which I love so much.
All the photos are scanned replicas, scaled down to fit the album. That's me as a baby in some of my most precious photos of my childhood. For the album itself, I cut out five mini pages, scored one side and threaded through some twine.
 Did you know that all the embellishments are miniatures too? How? The back of the chipboard packaging has an exact mini print of each chipboard piece in thick cardboard, which I cut out and used. How convenient!
I then proceeded to add my photos and embellishments, inking and distressing each one.
This whole album, with tin, is really tiny, measuring approximately 3" x 4". Something that could fit in your back pocket.
The last photo was taken way before I was born, just my parents and brother.

 Extra Elements: Gesso, Distress Inks, Glimmer Mists

 And here are some projects from the rest of the team:

Farm Girl by Angela McDaniel
 For Those About To Rock by Angela McDaniel
 Safari by Carla Keating
Card by Carla Keating
Man Vs Wild by Erika Lui
Cry by Erika Lui

Here are the kit crop times:

Sheung Wan Crop
12th March (Tuesday)
10:30am - 12:30pm
Hosted by Grace Wong

12th March (Tuesday)
7:30pm - 9:30pm
Hosted by Erika Lui

Discovery Bay Crop
14th March (Thursday)
10am - 12pm
Hosted by Angela McDaniel

If you're a kit member, or even if you also have this collection, I'd love to see what you do with these papers.

Thanks for looking,

You might also like

Related Posts Plugin for WordPress, Blogger...