Showing posts with label AC Dear Lizzy. Show all posts

Sunday, 11 May 2014

You Are My Happy

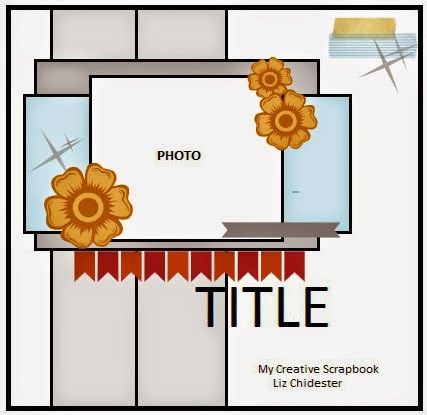
I can't believe how fast time is passing. It was only yesterday I remembered I hadn't done the My Creative Sketches April challenge yet and there are only a handful of days left before the deadline. I love seeing all the different layouts everyone comes up with for each challenge.

http://mycreativesketches.blogspot.hk/2014/04/april-sketch.html

 You Are My Happy
 Super cute papers and diecuts in pinks and blues.
 Instead of a banner under the photos, I cut and layered two paper fringes.
The sweetest diecuts. These would be great for baby pages too. For the border, I drew the scallops with an embossing pen before heat embossing with white embossing powder.
"You are my happy" -  I love this phrase.

Products Used
Patterned paper from Dear Lizzy Daydreamer and Pebbles Garden Party
Polka dot vellum from Crate Paper Oh Darling
Die cuts from Pebbles Garden Party
Cork butterflies with American Crafts DIY Shop
White embossing powder

Thanks for dropping by,


Sunday, 21 April 2013

Canvas Heart - Tutorial

One more post for today. I promised that I would do more tutorials, and here is one that I did for one of the retreat layouts. I think it works with the Tim Holtz distress paints really well and I just love the effect that came out.

Smiles, Giggles & Dreams
The background was created with the Crafter's Workshop Kaleidoscope template and Distress Paints.
 
Here's a close up of what I want to show you. The canvas heart.

Step by Step
1. Draw a large heart shape in pencil onto a piece of canvas. Mine measured approximately 5" wide.
2. Cut out your heart.
3. Using washi tape, tape up the edges of your canvas heart and seal it well.
4. Using a spritzer bottle of water, spritz the canvas until it is damp and absorbed. Blot off excess water.
5. Choose the Distress Paints you want to use.
6. Dab and rub the distress colours onto your canvas, in small segments.
7. Spritz the canvas with water and watch the colours blend and wick into each other. 
8. Once you like how it looks, dry it with your heat gun.
9. This is what it looks like dry.
10. Peel off the washi tape and you're left with a raw border. You can fray the canvas a little to give it more texture.

As you see from my close up picture, I then used white distress paint and randomly inked through the Kaleidoscope template. I also used my sewing machine to roughly sew two colours around the border and finally stamped on mini letters to finish it off.

 Here's something else I made for the layout. The pink rose is actually made from a piece of kitchen paper towel. It's basically a used paper towel, which I twisted and spiraled into a snail shell, before sticking on a button. The leaves were made from left over canvas. I stamped a swirl pattern with embossing ink on a patch of spare canvas, before heat embossing with clear embossing powder. I then dabbed on Shabby Shutters distress paint, before free-hand cutting out two leaf shapes. The stamped embossed areas create a resist effect.
Another close-up on the layout.

Products Used
White cardstock by Bazzill Papers
Chipboard, buttons, patterned papers, printed canvas elements and pink crepe by American Crafts Dear Lizzy 5th and Frolic collection
Kaleidoscope template by Crafter's Workshop
Distress Paints by Tim Holtz for Ranger Inks
Canvas from Canvas Corp
Yellow corduroy brads from Imaginisce (discontinued)

I hope you liked this tutorial and will try something like this for your next layout.  I would love to see what you make.

Thanks for looking,


Friday, 12 April 2013

Spring Cleaning

Hello there,

We're back from our Vegas adventure. We enjoyed ourselves immensely and Miss C is already asking when we can go back again. Mind you, I think going on holiday anywhere in the world would get the same reaction from her. I have some new paper lines to work with soon, so you'll be able to see glimpses of our time there.

You might have noticed that my blog is looking a little different lately. It's been more than a year since I reformatted my blog layout, so i changed the header image and moved things around a bit. Mainly, I re-labeled each post into more concise categories, so it's easy to search for paper lines and themes, as you can see from the right hand column and moved the blog lists to the left side. I hope this makes it easier to find things on my site. Please let me know what you think.

Home a day and I couldn't wait to do a layout, so here's a simple one of Miss C dyeing her Easter eggs.

Dye
I like the whimsical free form placement of the photos and elements here. The colours go well with the patterns in Miss C's dress as well. Don't you love the clipboard matts behind each photo?
 The eggs were cut on my eClips, and then inked. I hand-cut the banners and inked them too.
Cute co-ordinating flowers and wooden accents, sprayed to match, completes the page. It took a while to think of a title short enough for that space, so I kept it simple and just called it "Dye".

Products Used
Papers from Dear Lizzy 5th & Frolic collection
Paper flowers and wood accents from Prima Marketing
Felt flowers from American Crafts
Alpha glitter chipboard Thickers by American Crafts
Distress Inks in various colours from Tim Holtz for Ranger Inks
Heart shaped brads and twin from stash

Don't forget that next weekend (19th and 20th April), HKMC is holding their Spring Retreat, so if you haven't already signed up, now is the time to do it. There will be loads of welcome gifts, prizes and challenges, so join in the fun with us. For more details, check here.

See you soon,


You might also like

Related Posts Plugin for WordPress, Blogger...