Showing posts with label retreat. Show all posts

Wednesday, 9 October 2013

Three For Two

Hey there,

Finally getting round to posting on the retreat layouts I did. During the spring retreat, I got through four layouts in two days; this time managing to get through three full layouts and finishing off one I had been working on, so I'm not counting that one in my production count, although I will post it on here. Hopefully, this is not becoming a downward trend, or else I'll be coming away with just two layouts for the next retreat. Hope not!

Here's what I got through in the two days.

Lush Picks
 I was working on this at home and couldn't quite get it the way I wanted, so it was kept on the back burner for a few weeks. In the end, I got mad at myself and just told myself to finish it. All it was really missing were a couple of extra embellishments and the title. So here it is.
 I love the words strip and felt it would have been a shame to cut it all up, so left it whole. I do like the little postcard behind the photos. The title took forever to choose. We go fruit picking every time we're in the UK for the summer, so I was running out of suitable titles.
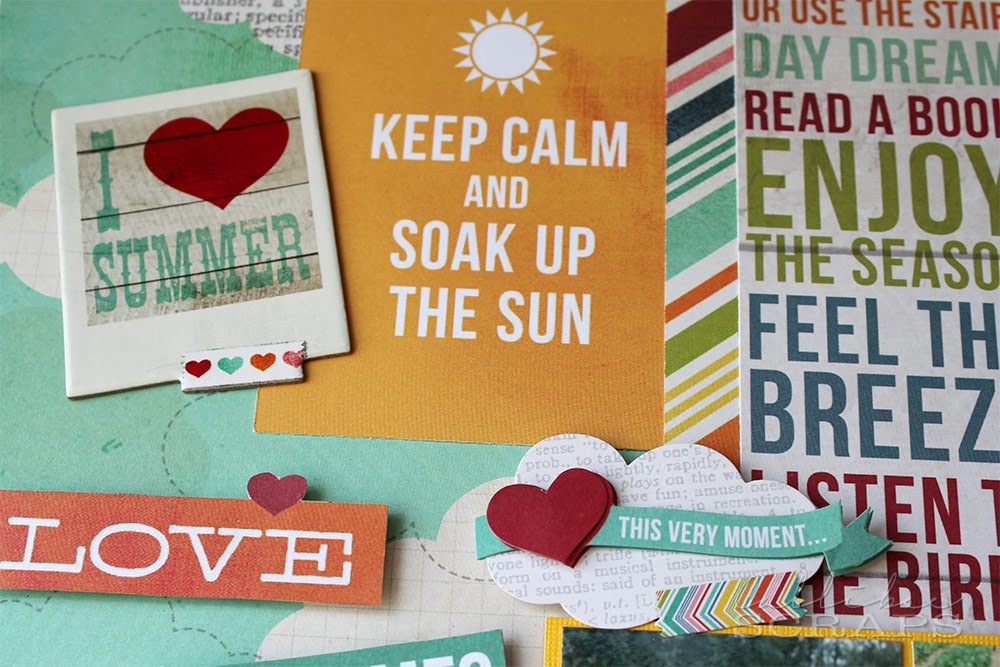
This paper collection is a lot of fun, with so many colours and cute embellishments.
Cute little 3D stick bike that I just had to put somewhere on the layout.

Products Used
Papers, chipboard, stickers from Simple Stories I [heart] Summer
Yellow cardstock
Yellow foam Thickers from American Crafts

Be Free
Chalkboard is a huge trend this year. Seems like all the paper lines have incorporated black/chalkboard papers or embellishments somewhere in their collections, and I am loving it. Any layout with a little (or a lot) of black really makes what ever you put on it pop.
I used a few fussy cut and sticker flowers and leaves to frame the photo.
I splattered on some Celadon and Ginger Flower Silks Acrylic Glaze on the background paper to add another dimension and bring out the colours of the paper line.
I free-handed the "be" to match the paper line. I like the added white acrylic paint accents around the elements. I think it adds movement and visual interest.

Products Used
Papers, stickers and quote card from We R Memory Keepers Chalkboard collection
Celadon and Ginger Flower Silks Acrylic Glaze
Black foam Thickers from American Crafts
White acrylic paint

   Lovely
Using the same paper line as the above layout, I used the ombre peach paper as the background this time, with black as a secondary colour. I love the shabby chic look of this page.
For the background paper, I added Carmen Silks to molding paste, before spreading it randomly through a circle lattice stencil. I then highlighted them with gesso. I rough distressed the edges of the papers before stacking them down, lacing ribbon around two of the pieces.
 Lots of pretty Prima flowers frame my cutie on both sides.
I added a gorgeous resin heart which I found locally, placing it in a chipboard frame. I also love the little bird and nest. I finished everything with a brush of gesso to highlight.

Products Used
Papers from We R Memory Keepers Chalkboard collection
Chipboard frame and decorative brads from My Mind's Eye Chalk Studio collection
Flowers from Prima Marketing
Black glitter chipboard Thickers from American Crafts
Circle Lattice Stencil by Heidi Swapp
Carmen Silks Acrylic Glaze
Enamel dots by My Mind's Eye
Heart, bird nest resin and ribbon sourced locally
White gesso from Golden

Zoommm
Here's something different from what I usually do. The colours are super bright and were perfect for these photos. I laugh every time I look at them. In the first one, hubby is driving with a fierce look; in the second, Miss C is driving, hence his scared look. I've decided that I really do need a line or two of journaling on the layout about this.
I wanted to complement the photos with all the accents - using frames to look like race tracks and arrows to suggest speed.
I love the cute tags and cameras. Again, another paper line with chalkboard papers and accents.
Love the little speech bubbles - they match the fun aspect of the layout.

Products Used
Papers and stickers from Echo Park Here & Now collection
Paper frames, arrows and arrow button from Fancy Pants What A Wonderful Day collection
Grey cardstock from Bazzill Papers

There you go. Three (and a half) layouts done. Wish there were more, but I guess I will have to challenge myself on that next retreat.

Now it's time to finish off my November HK Memory Chest kit club samples before we go away this Thursday. Miss C has her mid term holidays next week and it's also our 10th wedding anniversary on the 18th, so we're off to Rome and onto a cruise through the Mediterranean. What a trip that will be. Can't wait!!! Right after we get back, I'll be doing the biggest and most challenging cake ever for my cousin's wedding.

I'll see you back in a couple of weeks.

Thanks for dropping by,


Monday, 7 October 2013

HKMC Retreat Reveals - Kaisercraft True Romance

Hi all,

This paper line features beautiful soft colours, flowers and birds. Very romantic and soft, although it doesn't have to be for romantic photos. For my sample layout, I used a father/daughter photo instead.

Sky High
This collection let me indulge in my flower obsession to the max. Lots of fussy cutting and flower layering. The filigree frame was cut from a Spellbinders frame die, painted copper and clear embossed to give it a metallic effect.
I cut out thin black circles which adds a simple but effective contrast to all the pale colours and help balance the page. I love the jewel branches which I stuck in and around the flowers.
Here, I dangled the bird cage from a hand-sewn chain.
Lots of fussy cutting, flowers and doilies enhance the papers.

Extra Elements: Spellbinders frame die, copper paint, clear embossing powder, Prima and Petaloo flowers, Petaloo butterfly, Prima canvas alphas, Magnolia Stamps wired crystals, doilies in various sizes, black cardstock, lace trim, pink ribbon

Hope you enjoyed seeing the reveals. Next post, I'll show you the layouts I got through at the retreat itself.

See you next post,


Sunday, 6 October 2013

HKMC Retreat Reveals - American Crafts Mayberry

Hey all,

On to the sample layouts I did for the paper line reveals.  This was part of the retreat class pack which was handed out to all participants. Funnily enough, I'd already done another layout with this collection in May, which was part of  a My Creative Scrapbook kit I received.

Country Walks
This line is full of beautiful bright colours and patterns with a summery feel. The photos were taken during a long walk around a loch in Scotland this summer. Well done, Miss C for keeping up for the whole hour.
Look at those colours on the scalloped strip. I also love the little tickets - so versatile.
For the faux canvas paper, I added gold embossing powder over a floral stencil to add a little texture and interest.

Extra Elements: American Crafts Thickers, Prima Floral Stencil, Fancy Pants chalkboard tags, gold embossing powder, Studio Calico wood veneer pieces, buttons and die cut leaves, white acrylic paint

Gorgeous Smiles
I love how this collection has such a variety of colours and patterns; gingham against flowers, numbers against chevron - and it all works so well together. When I saw the flower paper, I knew which photo I wanted to use with it, and I'm sure you can see why.
For the background, I added molding paste over the same floral stencil I used in the first layout above. I then splattered on a dark pink ink and a "tea cup stain" effect with black ink in strategic places. The black chalkboard tags were stamped with white acrylic paint.
I edged all the papers with black ink to make each layer stand out.

Extra Elements: Prima floral stencil, Black Soot distress Ink, pink spray ink, Fancy Pants chalkboard tape and tags, American Crafts thickers, light molding paste

Next post:  Kaisercraft

See you soon,


HKMC Retreat Reveals - Luminarte Silks Tags

Hi there,

What a great time we had at the retreat this week. Twenty hours of hardcore scrapbooking and learning techniques and testing out new products. As I posted previously, we had fun using the Luminarte Silks Acrylic Glazes to create some wonderful tags, which could then be used on layouts.

There were several new faces as well as old, and it was wonderful to see all the layouts that were created. I think the downside (not really), is the amount of yummy and irresistible home baked goodies and snacks that were brought in. Completely ruined my diet!!

Now, to reveal those layouts and tags I gave you a sneak peek of previously.

Luminarte Silks Tags
The team made tags to showcase the different properties and uses of the Silks glazes. I made five (including the middle one, where I used the same techniques as this project, so I won't put that down here again).
I brushed Sunburst over the whole tag and let it dry. I then dabbed gel medium over a flower stencil on areas I wanted to keep yellow. After letting the medium dry, I brushed Pink Azalea over the whole tag, using a kitchen towel to rub excess glaze off the parts I covered in medium. This will reveal the yellow. I then repeated the procedure with the gel medium over stencil in empty areas and let that dry. This time, I brushed the whole tag with Boysenberry Silks before wiping off the excess yet again. I then edged the tag in Sapphire On Ice. The fan was done with Ginger Peach and Carmen. The bird in Boysenberry and Sky Blue. The leaves in Teal Zircon.
I used Ice Silks to stencil on the clouds. I then watered down Pink Azalea, Ginger Peach and Sunburst before brushing it across the tag ombre style. I then used Carmen Silks with an arrow stencil. The butterflies were done with Teal Zircon and Sky Blue.
With this one, I brushed Boysenberry, Sky Blue and Key Lime Silks over four quadrants of the tag. I then added the chevron with Nutmeg Silks before stamping on the circles. The stars were coloured with Sunburst Silks. For the quote tag, I inked up a stamp with white acrylic paint and stamped on chalkboard paper.
For this tag, I used Pink Azalea Silks over a chevron stencil on a white tag. I then dripped Key Lime over it and let it dry. I then blended in Tumbled  Glass distress ink over the whole tag. The Silks act like a resist, so the blue will not alter the pink too much. After adding the text stencil and alphabet stamp, I layered on the film reel, butterfly and title tag - all coloured with Silks (Ginger Peach, Sapphire On Ice/Pink Azalea and Key Lime respectively).

You can see how vibrant the colours turn out and the viscous texture brushes on so smoothly, you won't see brushstrokes. I love how you can layer on colours without adulterating the colour underneath (when dry) and how you can mix and blend colours (when wet). Have a look at this blog for more Silks projects and tutorials.

On to paper collections and sample layouts next.

Thanks for dropping by,

Wednesday, 2 October 2013

HK Memory Chest Autumn Retreat

Hey there,

It's retreat time again and it's coming upon us faster than you can blink. This weekend actually and this time, it will be held at the shop in Sheung Wan.

As always, there will be new paper lines to reveal and new techniques to teach and learn.  This time, we will be concentrating on Luminarte Silks Acrylic Glaze. I've posted about these before and they really are wonderful. They come in a range of 60 colours and brush on so smoothly and evenly. We've made several tags, using the glaze in different ways and can't wait to show everyone what they can do with them.

Here's a sneak peak of what I did:


 I'll do a full reveal after the retreat and show you a few of the techniques.

There are also a few papers being brought out especially for the retreat. Here's a few sneak peeks of the ones I got to work with. Again, I will post the full layouts after the retreat.

 Paper Line 1
Layout 1

 Layout 2

Paper Line 2
 Layout 1


It's going to be another fun filled retreat, and with this one being at the shop, everyone will be in familiar surroundings and have every resource at hand.

There are still a few places left, so check on the HKMC link for more details and pricing.

Dates and Times
Friday, 4th October 2013 from 10am to 10pm
Saturday, 5th October 2013 from 10am to 6pm

Hope to see you there,


Sunday, 21 April 2013

Two Days, Four Layouts

I may have mentioned before that I'm not the fastest scrapbooker, so when the retreat came around, I knew I probably wouldn't get more than five layouts done. I stayed true to form and just like the last retreat, only produced four pages.

Smooch You
 This was based on the April MCS Sketch challenge. I used the MCS February main kit and I like the simplicity of it. Not too many embellishments.
 This is the sketch the layout was based on.
 I like the contrast of love hearts to chevron arrows.
The "smooch" was coloured using the Salty Ocean Distress Paint by Tim Holtz

Products Used
Papers and chipboard pieces from Crate Paper Fourteen collection
Fabric Thickers and Glitter Thickers from American Crafts
Salty Ocean Distress Paint from Tim Holtz for Ranger Inks

Sweet Blossoms
I love this paper line from Webster's Pages, which HKMC released for the retreat. The cameras are to die for.
I love the sticker letters that come with the line. I dripped watered-down splotches of red distress paint around the page.
I can't get enough of the camera paper and just look at the camera washi tape. Swoon.

Products Used
Patterned papers, stickers, sticker letters and washi tape from Webster's Pages Composition and Color collection
White cardstock from stash
Barn Door Distress Paint from Tim Holtz for Ranger Inks

New York
Can you believe this paper is also part of the Webster's Pages Composition and Color line? I jumped on it when I saw it and finally, I could scrap my NYC photos. I printed them to 2.5" x 1.667", so I could fit more on the page. Can you see where I used the camera washi tape again?
I made the paperclip by fastening a brad to a normal office paperclip and gluing it down on the back. It helped keep my mini folder from falling open. I just love the bright pink foam letters for the title. It's perfectly describes NYC.
Here's the resin bottlecap that we made at the retreat. It really is quite cool. Also love the wooden geotag I glued on top.

Products Used
Papers, folders, stickers and washi tape from Webster's Pages Composition and Color collection
Wooden veneer elements from Studio Calico
Pink glitter foam Thickers from American Crafts
Flattened bottle cap from Bottle Cap Inc (yes, there is such a company)
Ice Resin from Susan Lenart Kazmer
Fact & Fiction Brads from Basic Grey

Love & Happiness
 This was based on an April Page Maps sketch. The papers came out last retreat and I did one layout with them for that retreat. I'd been hogging the rest of the collection until now.
 See the lock and key? Those were my VerDay pieces. The little Chinese embroidery charm was sourced locally.
I fussy cut the lanterns and "hung" them on black embroidery thread. The background bamboo paper echoes the bamboo in the photos.

Products Used
Patterned papers and chipboard from Graphic 45 Bird Song Collection
Coloured cardstock from Bazzill Papers
Lock & Key chipboard die cuts covered in Verday Paints from Ten Seconds Studio
Resin bird and embroidered charm sourced locally

So, there you go. My four layouts from the last two days at the retreat. I really do need to up my output next time, although I must say, I do love the time I spend just walking around, looking at what everyone is doing and helping out where I can.

Thanks for looking,


You might also like

Related Posts Plugin for WordPress, Blogger...